
Enhancing Your Node.js RESTful API Security with JWT Refresh Tokens
How to securely implement refresh tokens to provide seamless authentication in your Node.js, Express, and MongoDB application


Introduction
I’ve been writing articles about building a Node.js RESTful API using Express, TypeScript, and MongoDB.
The API is designed for a to-do task manager, allowing users to create, retrieve, update, and delete tasks. It is more of an educational project that touches on the basics of API development from scratch.
Each article covers a different aspect or feature and builds upon the previous one to provide easier-to-digest information.
These are the articles:


The last article in this series addressed security and the importance of having an authentication mechanism in place to access the application's resources.
We implemented an authentication mechanism, including registration and login, and an authorization mechanism based on JWT tokens to ensure that only authenticated and authorized users can access and interact with the data.
However, what we implemented, even though it works and serves its purpose well, comes with a few drawbacks:
Once a token expires (we set it to 24 hours), the user has to log in again, creating friction and inconvenience in the user experience.
If a JWT access token is compromised, an attacker could impersonate the user until the token expires.
That’s where the concept of refresh tokens comes into play.
In this article, we will discuss refresh tokens, how to set them up, and how to validate and use them for secure communication between the client and our server.
We will also implement rate limiting (more on that later), provide code examples, and offer best practices for refreshing tokens.
Before I begin the article, I would like to clarify a few points.
Prerequisites
I will assume the following:
You have a basic understanding of JavaScript/TypeScript.
You have Node.js and npm installed on your local machine.
To follow along, you downloaded the repository from https://github.com/daniosoriov/todo-manager.
Even if you’re newer to authentication and refresh tokens, I aim to keep explanations straightforward and accessible.
What Are Refresh Tokens?
A refresh token is an additional token to the access token that allows a client to get a new access token without requiring re-authentication.
In simple terms, a client uses a refresh token to get a new access token.
Then, the client uses this new access token to continue making requests to the server without interrupting their communication.
If we take a step back, getting an access token means the client must provide a means to authenticate itself with our server (for example, by logging in) before it can request data that requires authorization.
Access tokens are intentionally short-lived (typically 15 minutes) for security reasons, limiting the potential damage if they are compromised. However, the lifespan of an access token can create significant friction for clients who require frequent access to the server's data.
Can you imagine having to log in every 15 minutes due to the short lifespan of the access token? That’s just a hassle.
Refresh tokens are long-lived, for example, 7 days or more, enabling the client to get a new access token without the user's awareness using the refresh token.
The process of using refresh tokens enables a seamless user experience, as the final user can access data on the server without needing to constantly authenticate.
Here you can visualize the interaction:
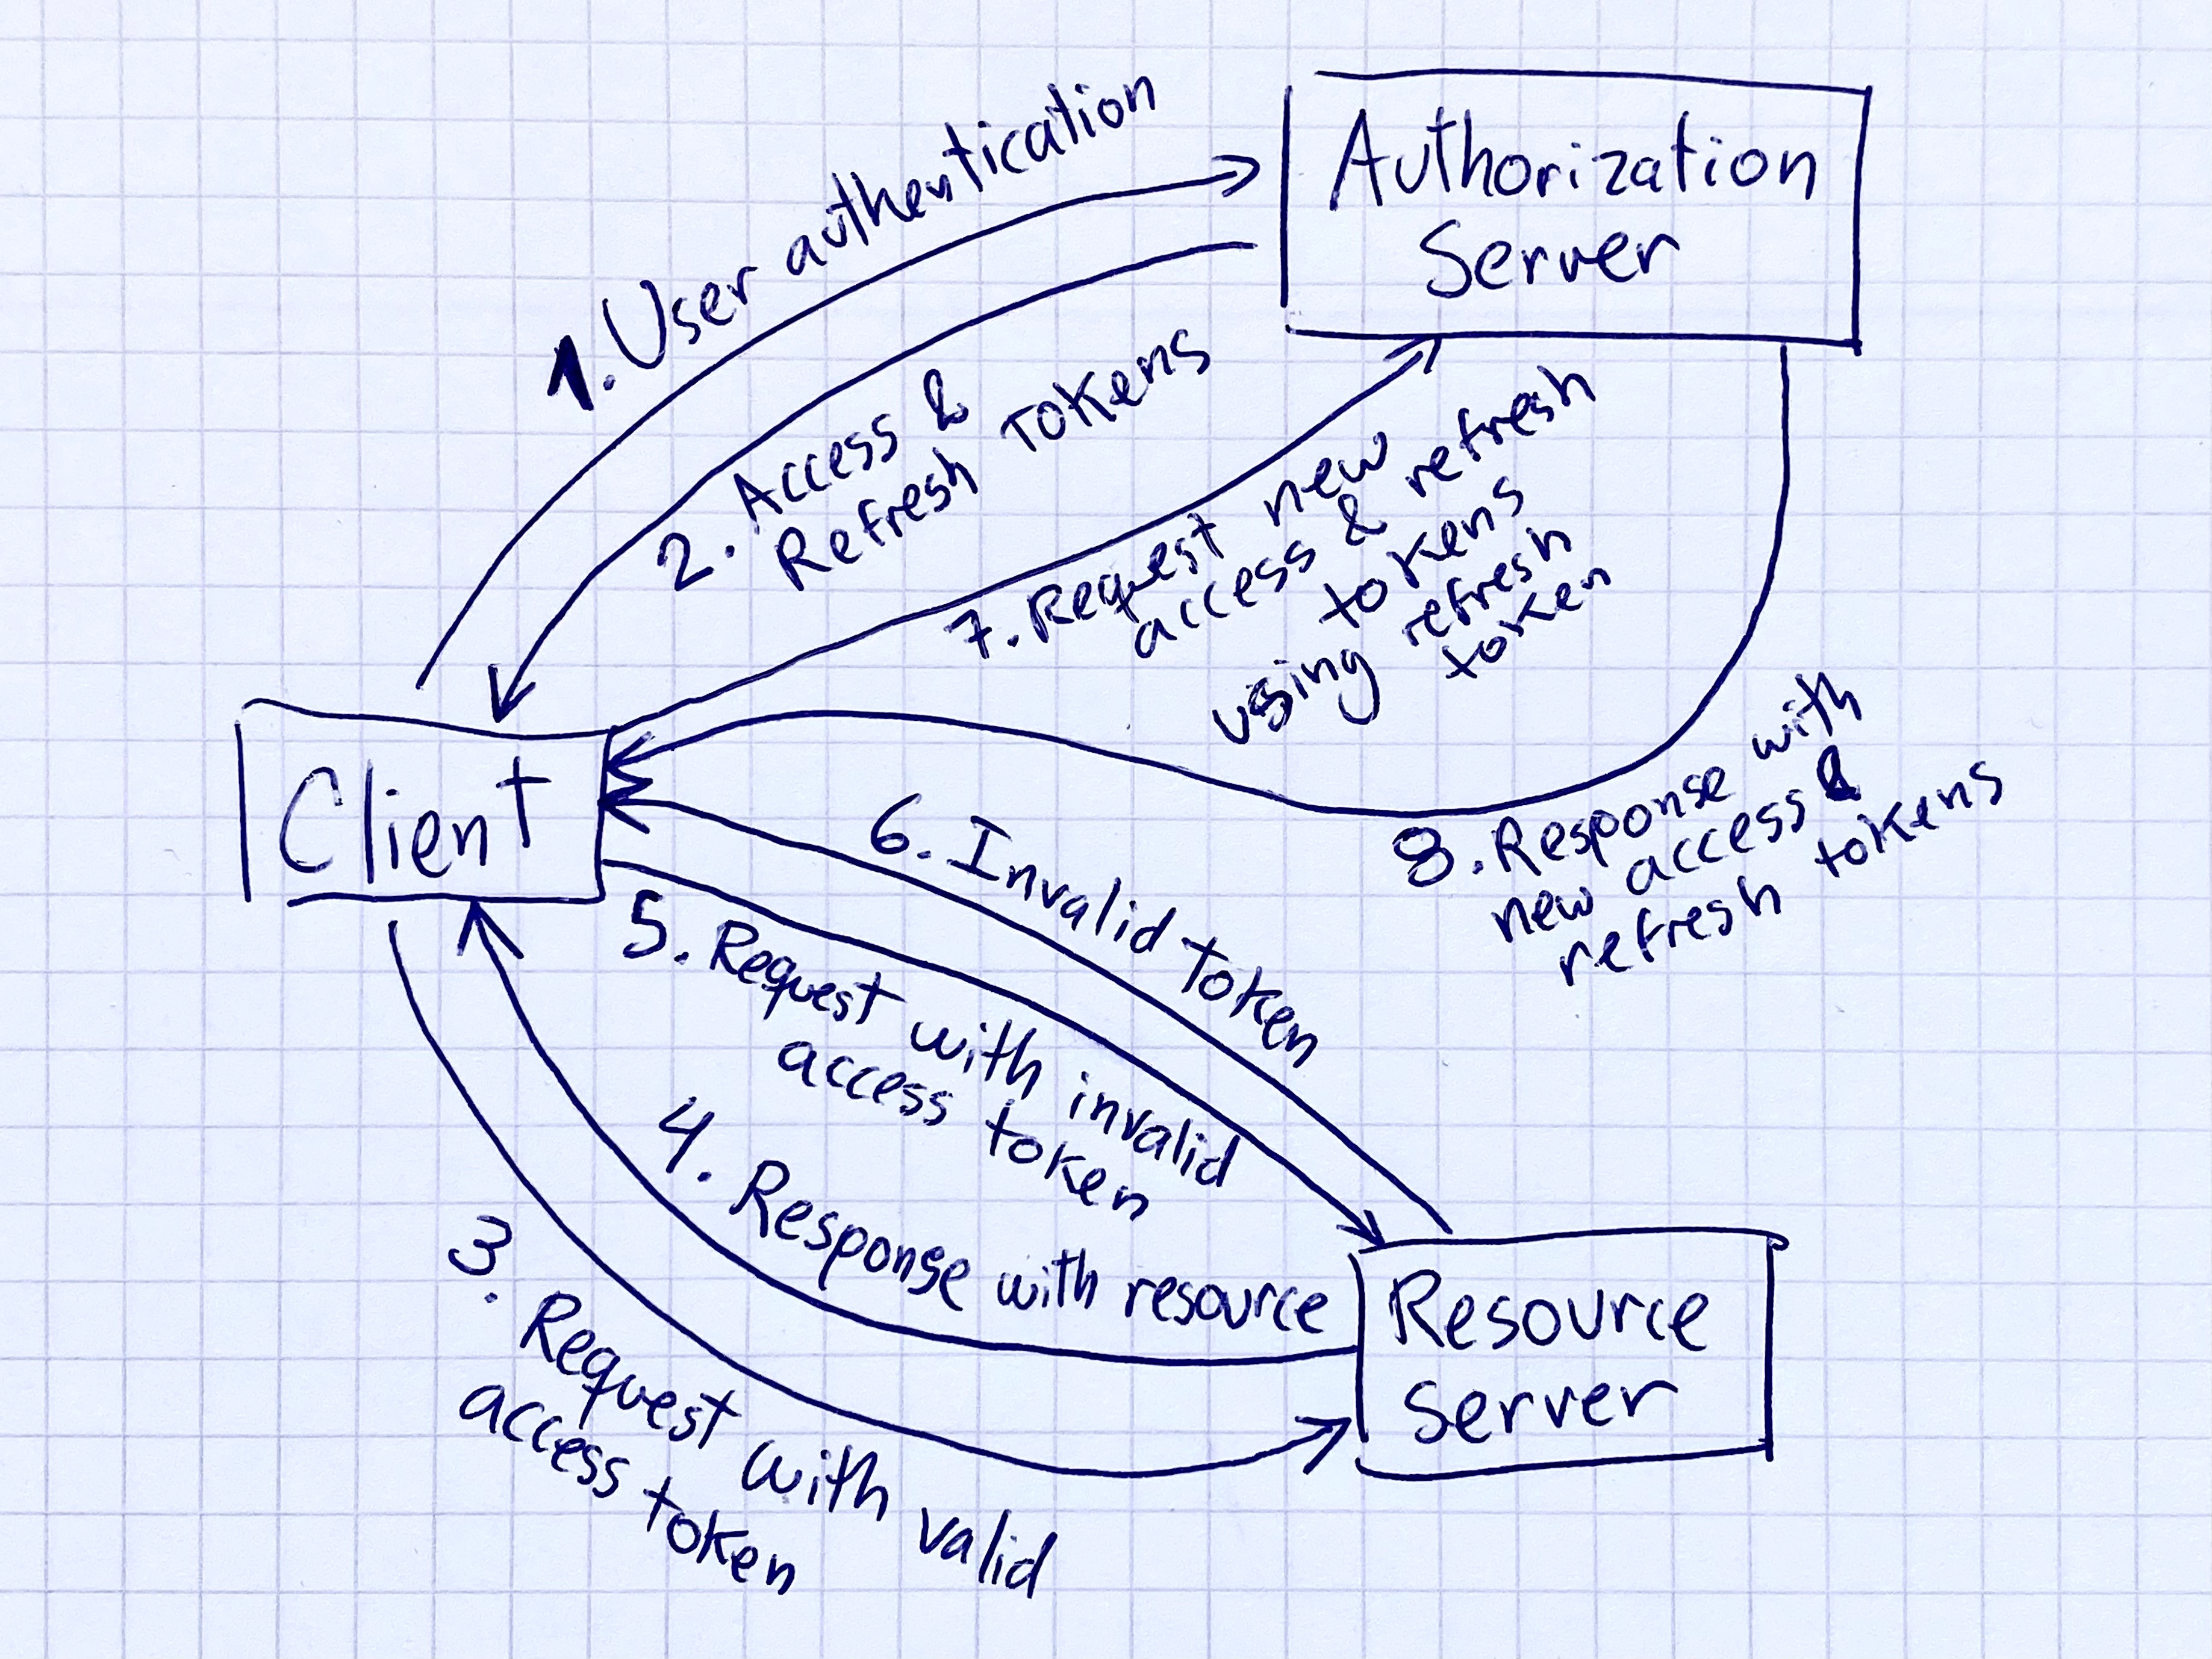
The client authenticates using their credentials.
The server generates and sends access and refresh tokens to the client.
The client makes requests with their access token.
Upon successful access token verification, the server sends a response with the requested resources.
The client makes another request, this time with an invalid access token.
The server verifies the access token, notices it is invalid, and sends an error message to the client.
The client makes a refresh token request using their refresh token received in step 2.
The server checks and validates the refresh token and sends the client new access and refresh tokens. The client can now make new requests.
For more information on what refresh tokens are, when and how to use them, you can refer to this comprehensive guide at auth0.com: https://auth0.com/blog/refresh-tokens-what-are-they-and-when-to-use-them/
Let’s look at a practical example of implementing refresh tokens in our Node.js application.
Setting Up the Refresh Token Endpoint
We must address a few key aspects of implementing the refresh token endpoint to ensure it functions properly.
We will create a Token Mongoose model to store the refresh tokens for each user.
We will create a middleware to validate the refresh token sent by the client in the request.
We will create a route handler to handle the request, generating a new access token for the user (and a new refresh token as well).
We will create rate-limiting middleware to limit the number of requests to get a new access token.
We will define our refresh token endpoint so clients can request a new access token.
Let’s examine these steps individually and see how they work together.
