
Securing Your Node.js API with JWT: Authentication and Authorization Made Simple
A Step-by-Step Guide to Implementing JWT-based Authentication in Your RESTful API using Node.js, Express.js, MongoDB, and TypeScript


Introduction
In my previous article, I discussed the importance of automated testing for an application.
More specifically, for a to-do task manager RESTful API.
You can find it here:

Hence, we are building upon a series of related articles to help you create a RESTful API application using Node.js, Express.js, MongoDB, and TypeScript.
At the end of the previous article, I mentioned that the next step would be to set up an authentication system to protect the data in our application.
Hence, this article is about authentication and authorization for your application.
Typically, they are used together so that when a user is authenticated (logged in), they receive specific authorization privileges based on their role and can therefore access data restricted to that role.
In other words, Authentication verifies who you are, while Authorization determines what you can access or do after you've been authenticated.
In our application, authentication is performed through registration and login, and authorization is achieved by protecting the routes and endpoints to which the user will have access. More specifically, we use JSON Web Tokens (JWTs) to protect our routes.
But what is JWT? Before delving into the details, I would like to clarify a couple of points.
Prerequisites
I will assume the following:
You have a basic understanding of JavaScript/TypeScript.
You have Node.js and npm installed on your local machine.
To follow along, you downloaded the repository from https://github.com/daniosoriov/todo-manager.
Even if you’re newer to authentication and authorization, I aim to keep explanations straightforward and accessible.
JSON Web Tokens (JWT)
JSON Web Tokens are a popular method for securely transmitting information between parties, such as client-server, as a JSON object.
JWTs are popular for securing APIs and web services due to their simplicity.
They consist of three parts: a header, a payload, and a signature.
In more detail:
Header: It contains information about the token type (JWT) and the signing algorithm used to create it.
Payload: It contains the actual data associated with the user or client using the token. It can include an ID or other unique identifier, as well as an expiration time.
Signature: Created by combining the encoded header and payload with a secret key using a specific algorithm. This ensures the token hasn't been altered (integrity) and was created by a trusted source (authenticity).
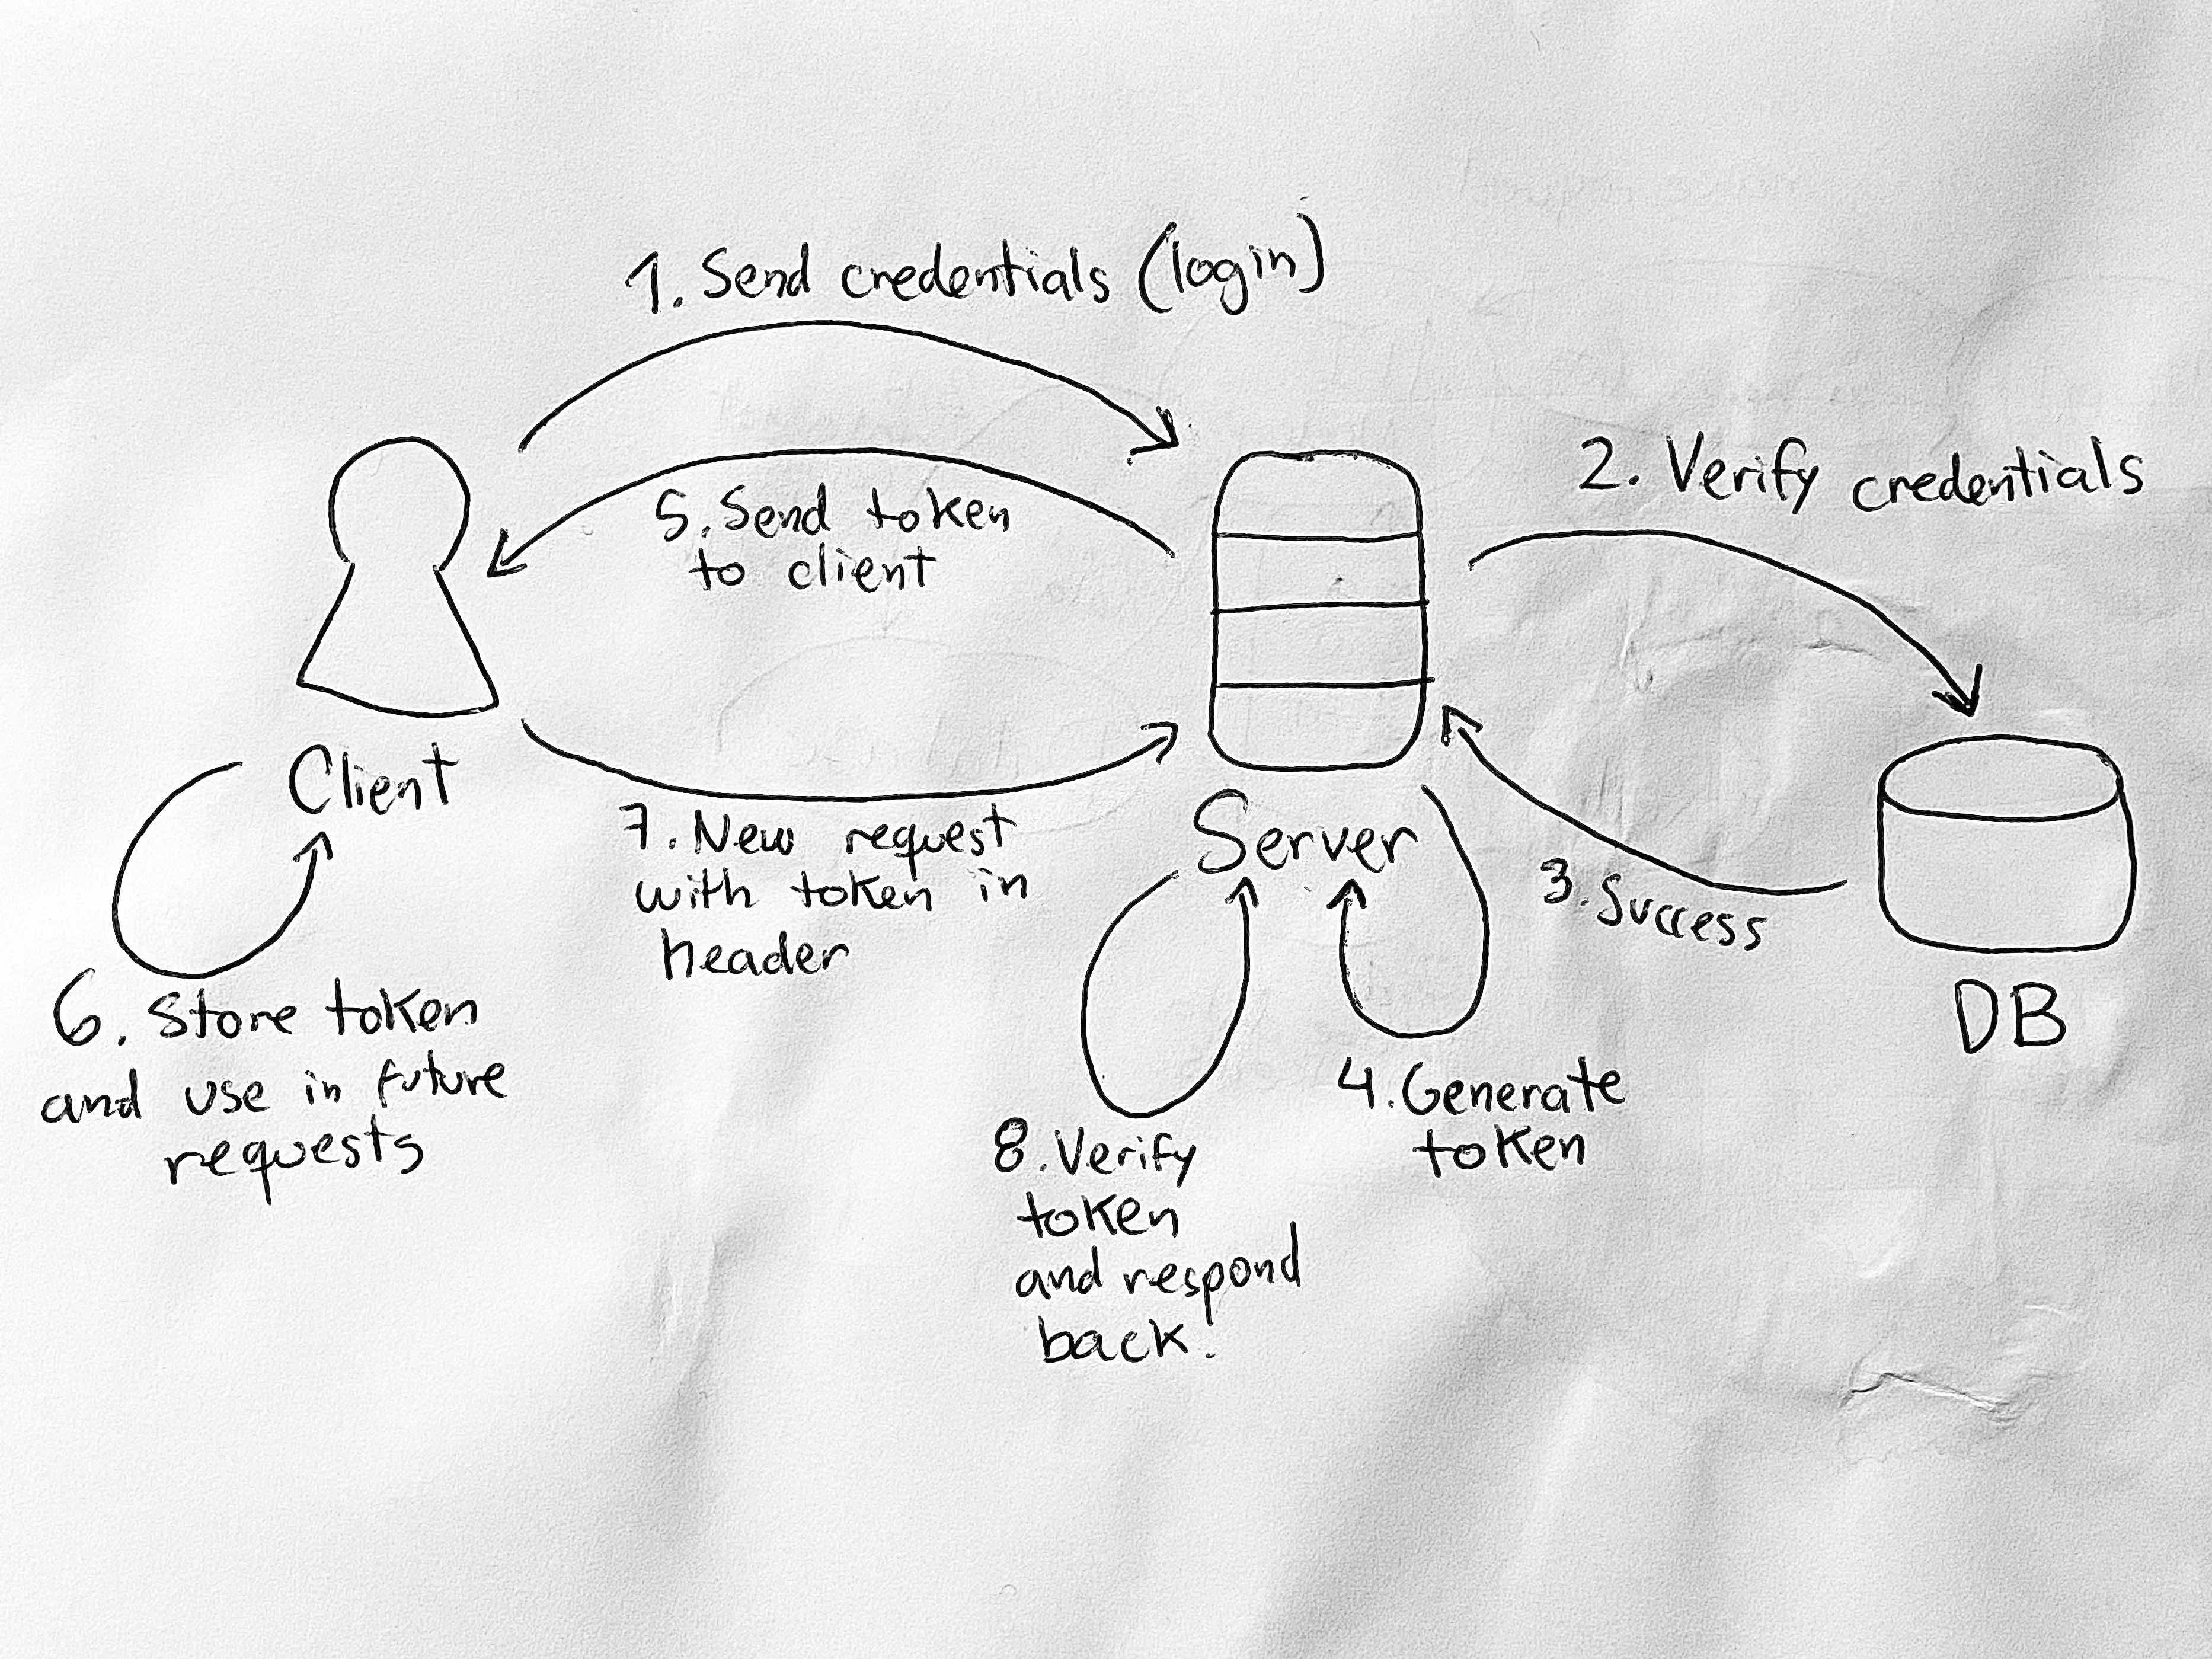
The interaction to produce a JWT is simple:
A user tries to log in to a server using their credentials, such as a username and password.
The server receives the credentials and attempts to log the user in.
Upon successful authentication (via login, registration, or other verification), the server generates a token using a secret key known only to itself.
The server then sends the token to the client.
The client must use this token in the following requests to the server to be authorized to access specific resources on that server. This is what will tell the server that the user is authenticated and potentially has the permission to access the requested resources.
When the server receives a request from a client, it checks the token and verifies its validity.
For a more visual representation, I prepared this diagram:
If you're searching for an effective method to implement authentication for your API, JSON Web Tokens (JWTs) can facilitate this process. JWTs are robust and straightforward to implement.
Let’s take a look at the steps in more detail with coding examples.
Implementing Authentication
As I mentioned earlier, authentication consists of two steps: first, registration, and then login.
First, though, we need to install the necessary libraries:
npm i jsonwebtoken bcrypt
npm i -D @types/bcrypt @types/jsonwebtoken
These commands will install the JWT and Bcrypt libraries on our project.
Bcrypt will help us hash the user passwords securely before storing them in the database.
Now that we have our libraries installed, we can proceed with creating the endpoint to create a new account.
User Registration
When a user wants to gain access to our API, they must first register with a username and password.
To receive the username and password from a client, we create an endpoint on our API to receive the data and save it in our database.
Keep reading with a 7-day free trial
Subscribe to Daniel’s Substack to keep reading this post and get 7 days of free access to the full post archives.